Showing posts with label baking. Show all posts

Tuesday, November 8, 2016

Dog-Friendly Birthday Cake! (gluten free)

What is this witchcraft!? How do I eat fire, mom!? 


Welcome to the world's most delayed entry!
Indie's 3rd birthday was September.
To celebrate, I wasted way too much time creating a dog-friendly cake so that I could sing happy birthday to my critters while we all hung out on the floor and fought internal battles to refrain from inhaling too much peanut butter.

This is an actual safe food for dogs
BUT
there's lots of oil and such in it
so you might wanna not give them the whole thing. I know we all like to binge-out and eat a full cake every now n again (amirite) but you're the responsible adult in this situation and you can't just let other people eat themselves into some kind of horrible diarrhea-obesity-diabetes combo.


Ingredients
1/4 cup honey
2 tbsp coconut oil
1/2 cup coconut flour
1tsp baking powder
1/4 cup milk
1/2-1 cup blueberries
3 eggs
Peanut butter (for topping +/- dog biscuit, kibble, chicken pieces, cheese pieces, whatever)


Instructions
1. Preheat Oven at 350 degrees F
2. Mix your eggs with a mixer for at least 1min (they should get bubbly and fluffy)
3. Add milk, oil, and honey - use mixer
4. Add in dry ingredients - use mixer
5. Add in blueberries (I used frozen but fresh is probably better re: moisture) - Hand stir them in (unless you're looking to shred your berries and make a blue cake, that's cool too!)
6. Pour equally into whatever mold you decide. You should have enough batter for 2 mini pie molds, but if you want more dog-friendly portions without needing to cut into slices, I'd recommend cupcake pan that is VERY WELL greased with either coconut oil or avocado oil (since those are the best oils for the dogs and higher burning point). I would not recommend using an actual 9" pie pan as this is a very dense mixture and takes forever to cook.
7. Bake for 30mins (may need to keep in longer depending on the size of pans and your oven). Most of the top should be browned but not burnt! If you find the outside is cooking too fast, bring temperature to 325). Note that the larger your pan, the lower the temperature and the longer you should keep it in the oven.
8. When done, leave to cool for 15-30min, then CAREFULLY remove from pans and place onto a papertowel and place the cake/papertowel onto a metal grate to allow air to get to the bottom of the cake (because it'll likely be kind of soggy sort of "bread pudding"-esque on the bottom and therefore harder to cut later).
9. When fully cooled, use peanut butter and your toppings as icing and decoration!


Tuesday, June 28, 2016

Healthy Low-Calorie Fruit Explosion Muffins

I have had berries in my fridge for quite some time and I've been worried that they wouldn't get eaten by me in the near future, so I tried to make blueberry muffins with a recipe I found online. Unfortunately I had added all the liquids together in this recipe before I realized that I put all the quantities in wrong and forgot to add the oils required. What the hell, I know. Anyway after that I figured F*** IT LETS DO IT LIVE so I just improved the rest of the ingredients and recipe.
I figured that the muffins would be a total bust, but when I tried one I discovered that they were probably the best thing I've ever invented!!!!

Having recently moved, I don't have much of anything in the way of baking supplies. For that reason, these muffins aren't keto friendly, and they aren't high in fibre... but they are high in awesome taste and low in calories...that counts for something, right?

Scroll onward for the recipe! :) :) :)


Ingredients (Makes 12 muffins - 125 calories per muffin)
1/2 cup Splenda Brown Sugar Blend
1 Large egg
1 1/4 cup flour
1/4 cup Wheat Germ (raw)
1/2 cup nonfat plain greek yogurt (I used 0% fat Oikos because, really is there any other kind of plain greek yogurt?)
1/4-1/2 cup water
2 tsp baking powder
1/4 tsp salt
1 1/2 tsp Vanilla extract
1/4 cup milk creamer(?) + 1/4 cup water
3/4 cup blueberries (fresh)
1/4 cup strawberries (3 small strawberries cut up into little chunks)
1/2 tsp jam for each muffin (total ~ 2 tbsp) - I used double the fruit strawberry with no added sugar


Instructions
- Preheat oven to 425 F degrees. Fill 12 muffin tins +/- paper muffin things. Spray/grease them well!
- In a large bowl, mix milk/creamer + 1/4 cup water, sugar, yogurt, and vanilla until there are no clumps
- Add flour, wheat germ, and salt to mixture. Add water (1/4 - 1/2 cup) until mixture is smooth, creamy but easy to stir. Do not add berries!
- Add baking powder.
- Using a tablespoon, fill each muffin tin just enough to cover the base of the tin (about 1 large tbsp) with batter (does not contain berries)
- Put in oven for 3-5 minutes just until the dough looks as though its starting to bake enough to handle jam on it without collapsing
- With remaining batter, add berries and mix just enough to have things stirred evenly. Don't overmix!
- Take muffin tin out of oven. Add ~1/2 tsp of jam to each muffin tin.
- Evenly distribute the rest of the muffin batter (now containing berries) in the 12 muffin tins.
- Decrease heat to 375 degrees then put muffins back in oven.
- Cook for 20-30 minutes depending on your oven. There is a lot of moisture going on inside the muffins so they will take extra time BUT you want to ensure the bottoms are not burning.
- Take out. Leave for a couple of minutes to cool then enjoy!!! SO GOOD WARM


Thursday, June 23, 2016

Gluten Free Garbanzo Brownies Recipe

As most of you know, I recently moved from my home province to a new province for residency. Luckily, I came here a couple of weeks prior to my start date because there is apparently a lot to be done when it comes to moving! With the help of my family, my new house is now a home and I'm sure I will post something about it soon enough. BUT NOT TODAY BECAUSE TODAY THERE ARE MORE IMPORTANT THINGS TO DISCUSS!

I've been living in this province for almost two weeks, and I more or less don't know anyone other than my sister and her significant other in the entire city. That was great while my parents were here, since it meant lots of family time. It was good when my parents left and my sister was still on her days off of work because we could hang out all the time. But now that she's back to work and it's still a few days until I start, it's been the dogs and I 24/7 all day every day.

So today, there was an excessive amount of productivity that ended in a poignant finale with me making (wait for it)... CHICKPEA BROWNIES! (Chickpea = Garbanzo)

And they're not garbage! Honest to God (I would tell you)! They're actually really super awesome!
Gluten free too! And no weird new-agey ingredients that you need to go to Whole Foods for (with their weird hard looks... yeah thats right, I went there and I got weird looks wannafightaboutit)!

WHEEEE!!!

Make sure you own a blender though. I only have a magic bullet and buddy let me tell you de-beaning the garbanzos took an eternity without an actual blender.


Gluten Free Garbanzo Brownies


Ingredients

  • 3/4-1 cup milk chocolate chips (or however much you have in your cupboard, whatever)
  • 2 heaping tbsp unsweetened cocoa
  • 1/2 tsp baking powder
  • 1/2 tsp salt
  • 1/4 tsp cinnamon 
  • 2 large eggs
  • 1-2 tbsp melted butter (or coconut oil)
  • 2 tsp vanilla extract
  • 1 can rinsed garbanzo beans/chickpeas (I used the 540ml can... I'm pretty sure chickpeas only come in that one big ole jesus can)
  • 1/2 cup packed brown sugar (I used the splenda brown sugar for the increased sweetness and less calories because, you know, I'm unhealthy like that)
  • (optional) 1/4 cup raisins


Instructions
1. Blend the crap out of the chickpeas. This is going to take a while and will likely require you to add in the eggs, melted butter and vanilla extract. Make sure there is no lumps! Mixture should be creamy.
2. In a medium to large bowl, mix cocoa, salt, cinnamon, and brown sugar
3. Add the chickpea/liquid mixture to your dry ingredients. Mix well!
4. Melt your chocolate chips (i used the microwave for 25 seconds, stirred then microwaved again for another 10 seconds)
5. Add chocolate chips to bowl of things. Mix well.
6. Add your baking powder. Mix (but don't overmix!)
7. Line a brownie pan (I have a 9x9 inch pan) with parchment paper. You don't need to grease it this way! :)
8. Add brownie mixture.
9. (optional) add 1/4 cup of raisins to top of brownies and cover the raisins just slightly with the brownie mixture. I did this so that they would not sink to the bottom of the pan and burn.
10. Cook in a preheated 325 F degree oven for 26-32 minutes (check them at 26 minutes. At that point I increased the temp to 375 for the last 4 minutes in order to brown the edges).
11. Take out of oven and let cook for 5-10 minutes. Then remove the parchment paper containing your brownie block from the pan and cut with a sharp knife.
12. Inhale
13. Write me about how surprisingly amazing the brownies are


WOOOO SO GOOD OMFG Seriously give it a try and let me know what you think!


Sunday, April 24, 2016

New and Improved Keto Brownies!

The last recipe I posted was a slight alteration of one from another website, but after a week or so of poking around in the kitchen, I have finally created a new brownie monster that is worth the effort of a blog.

It's chocked full of good stuff like butter and coconut oil, very easy to make and SO WORTH IT!

It's taken me a while to post it because I went through a few different trials to get the ingredients just so as many of my previous attempts have either ended up falling flat, dry, or going super crumbly after a day. These seem to live up to their valour so I hope you like them!!!


New and Improved Ketogenic Brownies!!! 
(   fit for fat fasting :) ) 

Makes 6 big brownies. 
Macros: 
Calories - 180
Net Carbs: 2g
Protein: 5g
Fat: 17g

Ingredients:
2 full eggs (yolk and whites)
4 tbsp salted butter
1 tbsp hard coconut oil
1 tbsp pecan butter 
1 tsp baking powder
1/3 cup unsweetened cocoa
1/3 cup almond flour
1/3 cup erythritol 
pinch salt (~1/4 tsp or less)

+ coconut oil to grease your pan with

Instructions:
- Preheat oven to 300 degrees Fahrenheit and grease a large bread pan with coconut oil
- Melt butter, nut butter, and erythritol in a pan on the stove. Make sure that the sweetener is completely dissolved to reduce the 'cooling' effect you may have heard about that goes with erythritol.
- Beat eggs in a bowl
- Add all other ingredients EXCEPT baking powder to the bowl with the eggs. Mix slightly.
- Pour wet ingredients into bowl with the other ingredients. Mix well.
- Pour mix into bread pan and put in oven for 30 minutes.
- Take out, allow to cool.
- Enjoy!

These brownies are amazing on their own, especially after being refrigerated OR when slightly reheated.
For an extra protein hit I like to cut the brownie in half, and microwave half of a quest bar on top of the half brownie. It is frickin' amazing.

Let me know if you like the brownies (or if there's anything else you think I should attempt to bake)!!! :D


-A. 

Thursday, March 24, 2016

Ovo-Lacto Ketogenic Waffles


More or less ever since I met a certain lovely British person, I have been following a ketogenic diet. 

I haven't been doing ovo-lacto ketogenic diet for very long (probably about 2 weeks) but I am more or less over the hump that is KetoFlu (or as I call it KetoStorm because hell hath no fury like a hungry, sleep deprived carb-withdrawing woman) and have been in official ketosis for about a week (according to urine tests. yes, ew whatever get over it).

Initially I was miffed about the high fat aspect of it. Given that I tend to troll a lower calorie diet and fat is 9 calories per gram I have more or less avoided that particular macro for a very long time. But once reading a dozen peer-reviewed journals, I bit the bullet and found fat to add in to my diet so that I attain macro requirements. 

I'm a big advocate for HEALTHY fats and don't agree with the majority of the keto people I've come across - I don't agree 5lbs of bacon per day deepfried in whatever people deepfry in is necessarily the best choice long-term for your health. So I focus on coconut oil, olive oil, and avocado oil to my vegetables. I don't eat deep fried anything for that matter.

A big issue with following a ketodiet has been the fact that I'm vegetarian. I eat eggs and dairy, but I HATE eggs. With a passion. Their texture freaks me out so bad. Additionally, I have a certain detestion for protein powder ever since that incident in 2009 when I made a cottage cheese protein powder shake and left it to sit in the summer heat for like 4 hours before drinking it. Who would have thought curdled warm cheese liquid didn't mix well with protein powder (or my GI tract for that matter) ?!

Nevertheless I've been using myfitnesspal obsessively in combination Fitbit HR to ensure I'm not slacking off food and exercise wise.

I am, however, a creature of (bad) habit so calorie counting continues to be something I live by. Calorie Countins is a nightmare and I don't recommend it, particularly if you're obsessed with calculations and numbers.  I spend probably 30% of my day determining calories, net carbs, carbs, fat, protein and workouts in order to come up with some magical ratio that makes me have the feel-goodies on the inside. So... don't count calories if you can help it. Don't do what Donny Don't does.
Obligatory Simpsons reference
To appease the high fat, low carb, low calorie, high protein etc etc etc nonsense, I've scoured the internet for recipes that could make eggs more palatable and protein powder not make me urge from classical conditioning. 

I did find some, but I tend to tweak things to my liking. So without further adeu, here is my somewhat invented delicious but a bit arbitrary recipe for Keto-Waffles!


Ingredients *Makes 7 waffles*
4 eggs (with yolk!)
1 tsp vanilla
1 tbsp baking powder
1/4 cup cookies and cream flavored low-carb whey protein isolate (I use Promasil Rivalus)
3/4 cup almond flour
3 tbsp coconut oil (solid but mushy)
1 tbsp peanut butter (can substitute for any nut butter, this is just all I had in the house)
1/2 cup water (I'm not certain you even need this)
1-2 drops liquid stevia (optional)

Directions
-Using a blender/magic bullet, blend eggs with coconut oil and peanut butter.
-Add protein powder and almond flour + vanilla and stevia. Mix by hand unless you have a big blender (lucky!)
- Add water. Mix some more
- Add Baking powder last. Note that this tends to be clumpy. I'd prefer to blend it but I didn't because I'm stubborn.
- Put in waffle maker. Note if you have a shit waffle maker like me you'll need to leave them in to brown longer than the waffle maker light recommends. They won't get dry at all so leave them in as long as you want for browning purposes (I hate soggy food)
- Top with whatever you want (not added to nutrition breakdown - I like using 1/2 an avocado, OR nut butter)

Nutrition Breakdown (per waffle)
Calories: 130
Fat: 11g
Protein: 8g
Net Carb: 1g


This is the first recipe for keto waffles that I've made which doesn't get dry, and has no proteiny taste. They don't rise all that much but they do taste AMAZING (I'm kind of addicted to them right now), and they taste even better if you store them in your freezer and toaster-oven them as needed. 

Give it a try and let me know what you think! :)


Wednesday, March 23, 2016

Guess Who's Back...

Instagram
Hi world!

Indie photobomb selfie

Very quick blog before work and then I swear I'll write a catchup one but I wanted to give a heads up this blog might go another way for a bit.
I've been doing some/a lot of traveling with some/a lot more to go this year and I wanted to do some travel blogs.
I've also been following a low-calorie ketogenic ovo-lacto vegetarian diet (yes, that's a thing now) and I wanted to address that as well potentially with some recipes I've been slowly coming up with.

I did, however, finally buy a new stylus for my tablet since my dogs ate my original one so there may be comics in the future.

Right now I'm a bit limited on time for comics because I'm studying for my qualifying exam to graduate med school and start my residency!

Hopefully you guys don't mind the shift from the comedian + gif world (can't say that world is gone completely though because really who are we trying to kid) to Traveling, Food, Medicine and other things wonderful and mature... and I hope to hear from you soon!


xoxoxoxo

-A.

Also, follow me on instagram where I put pics of traveling and food and (obviously) my dogs @p76acw ! (link below and above!)

Click to Go to My Instagram!

Friday, June 6, 2014

Baking: I can do it.


So. Here we are. Thursday (?) night and I should be asleep by now, but boyfriend was all like SOME KIND OF THING WITH BAKED GOODS NECESSARY TOMORROW and I was like "TIME FOR WINE" and then some time passed and here we are.

Anyhoo... for those of you who know me, and for the remaining 2-6 people from the US and Germany who do not but still awesomely read my blog (YOU ARE MY FAVORITE!!!) ... I have no domesticated abilities. I can't fold a fitted sheet, and I barely know how to put dishes in the dishwasher. But I figured, "f it" and opted to make banana chocolate chip muffins because... YOLO. And that's that.

Long story short I took a bunch of pics until my phone died of me attempting to make muffins while ... having... refreshments.

So here is my photo blog of producing muffins that may or may not be best used as bird feed or potentially door stoppers.

You're welcome. 


THE RECIPE: Banana Chocolate-Chip Muffins


Makes 12   ingredients


  • 1 1/2 cups all purpose flour
  • 2/3 cup sugar
  • 1 1/2 teaspoons baking powder
  • 1/4 teaspoon salt
  • 1 cup mashed ripe bananas (about 2 large)
  • 1 large egg
  • 1/2 cup unsalted butter, melted
  • 1/4 cup milk
  • 3/4 cup semisweet chocolate chips"

http://www.epicurious.com/recipes/food/views/Banana-Chocolate-Chip-Muffins-101020

...thats right; Copy and Paste. Deal with it.


Step 1: Collect ingredients. Put dry things in one bowl and wet things in another.

Flour: get it in der.

More flour: cuz i said so.

Shit. When did that get there and does it count toward  1 1/2 cups of flour?
yeah whatever keep going!

WHEN DID THAT GET ON MY FACE FUCK IT

2/3 cup sugar in iceberg format? Yeah whatever

SUGAR ICEBERG LOVES IT


Step 2: Find a blender. Put two old bananas in it. Blend them. (This = not rocket science)
WHO GAVE ME A BLENDER THIS IS SICK

This is my happy face. So. Thank my orthodontist from grade 8.
Add bananas. One of which must be minimum 4 months old and from the freezer and look kind of like a flaccid.... balloon. A flaccid balloon. 


Step 3: Pass time once things are in the oven. Annoy dog. Rethink this whole baking business and question why the hell you started baking muffins this late at night. Reconsider your life in general. Have an existential crises. Check Facebook.
Time passes.
Check Facebook.

DOG WANTS TO SEE WHAT IS IN THE OVEN

....or maybe she doesnt and I'm just making her look. Who knows... mysteries of life.  


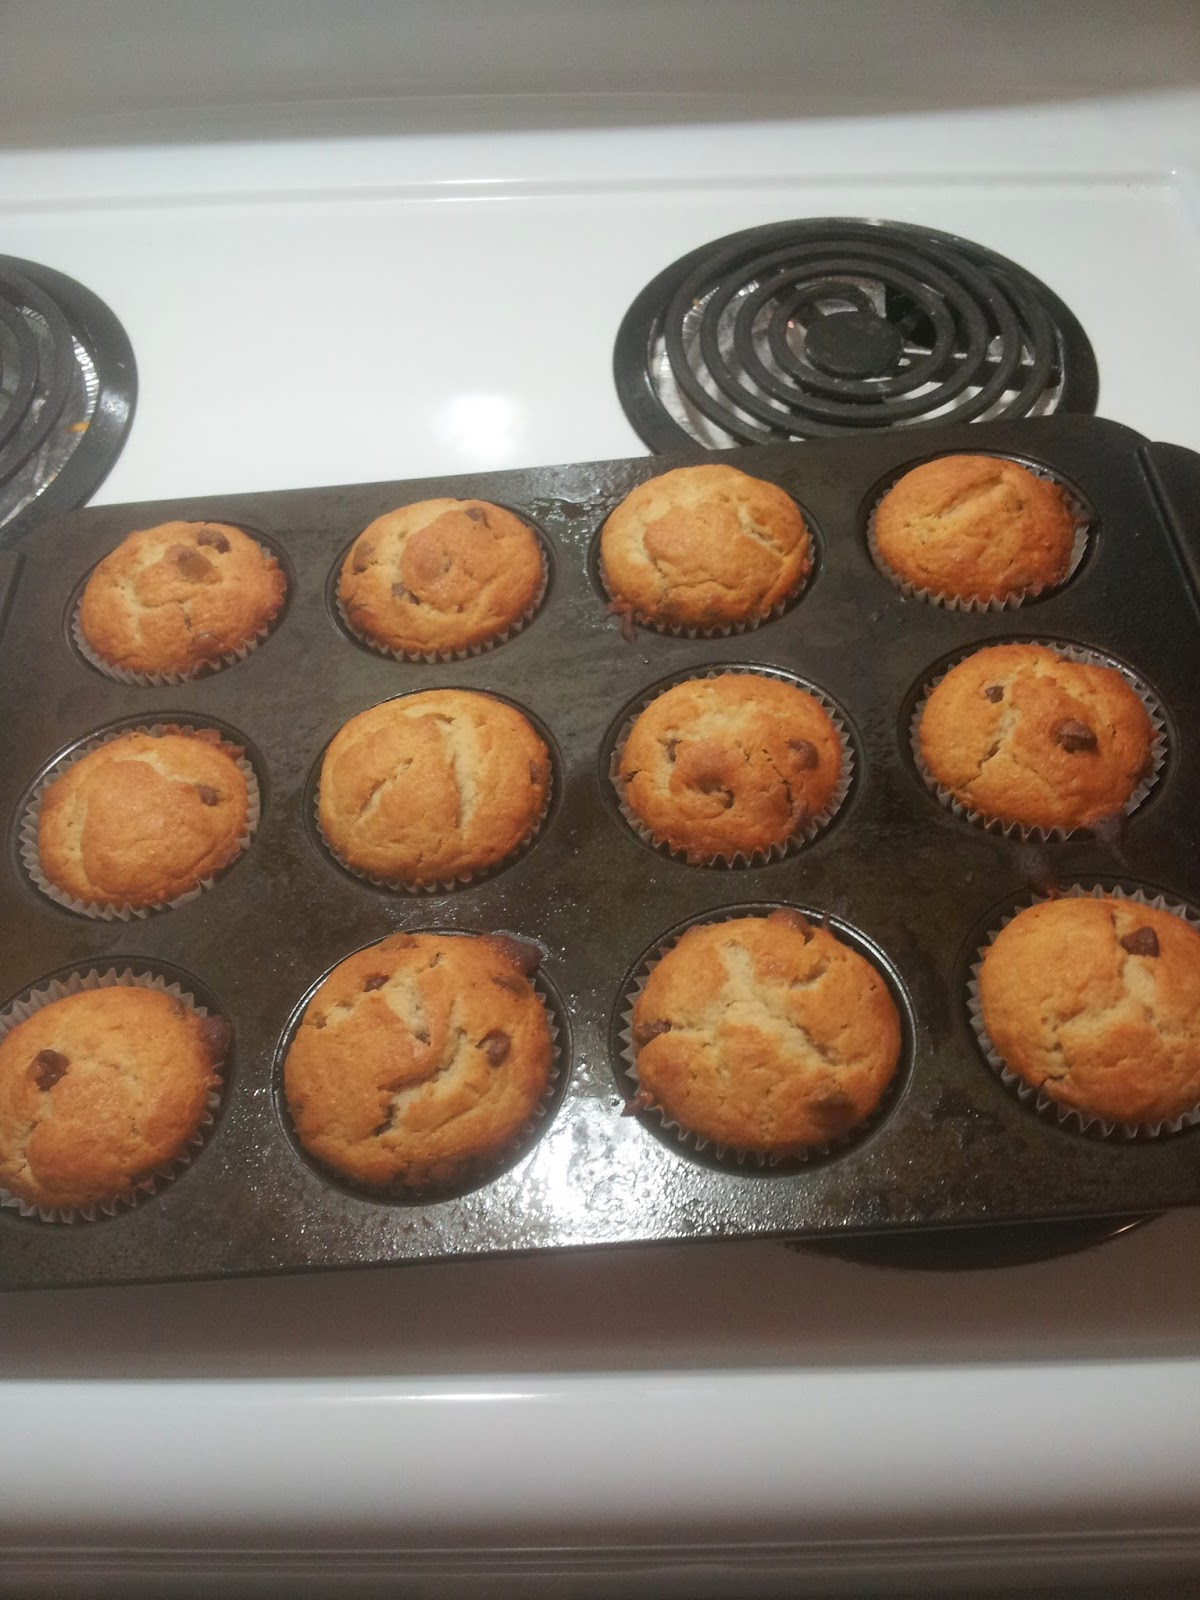
Step 4: Be impressed that SOMEHOW this wasn't a total disaster (given that I woke up this morning and didn't initially even remember baking anything)
Can pass for edible!

LOOKS LIKE MUFFINS! #notafailure #moveovermarthastewart


This morning I checked them (for science!) and they taste like muffin which is kind of miraculous if you ask me!

So there is my journey through baking. 
This is also an example as to why with regard to ideas for my blog should be (when first getting invented), baking didn't make the cut. It is WAY easier (for me) to write up sarcastic funny-ness than try to do something with an expected outcome.

And now I'm off to work again! WHEE!

Happy weekend, readers of Dr. Ang. ! 


Heart heart heart

- A.